


TP-Link Deco M5 Setup Guide
How to Set Up Your Deco M5 Mesh Wi-Fi System
Last Updated: June 16, 2026
The TP-Link Deco M5 creates a seamless whole-home mesh Wi-Fi network and is configured using the TP-Link Deco App on your smartphone or tablet.
Follow the steps below to connect your Deco M5 to your Wakey Internet modem, create your Wi-Fi network and add additional Deco units if needed.
Important — Download the Deco App Before You Begin
The Deco M5 is configured through the TP-Link Deco App. You’ll need a smartphone or tablet to complete setup.
We recommend downloading the Deco App before disconnecting your existing Internet equipment whenever possible.
Already disconnected? No worries.
When a Deco M5 is new or ready for setup, it should broadcast a temporary Wi-Fi network similar to:
Deco_XXXX
This temporary setup network is normally open by default and does not require a Wi-Fi password.
Once your Wakey modem is online and connected to the Deco, you may be able to connect your phone or tablet to the Deco_XXXX network and use that connection to download the Deco App. You can then return to the app and finish configuring your permanent Wi-Fi name and password.
If the temporary Deco network does not provide Internet access, use mobile data or temporarily connect to another available Internet connection to download the Deco App.

Before You Begin
Make sure you have:
- Your TP-Link Deco M5 unit or units
- A smartphone or tablet
- Your Wakey Internet modem or active Ethernet Internet connection
- An Ethernet cable
- The TP-Link Deco App
- A free TP-Link account
For iPhone and iPad users, make sure the Deco App has permission to access your Local Network when prompted.
What Your Setup Will Look Like
Coax Outlet → Wakey Modem → Main Deco M5 → Your Wi-Fi Devices
Your modem provides the Internet connection. Your Deco M5 takes that connection and creates your home Wi-Fi network.
Step 1 — Download the TP-Link Deco App
Download and install the TP-Link Deco App on your smartphone or tablet.
Get the Deco App
Android:
Download the Deco App from the Google Play Store.
iPhone / iPad:
Download the Deco App from the Apple App Store.
Once installed, open the app and allow any required Bluetooth or Local Network permissions requested by your device.
Step 2 — Create or Sign Into Your TP-Link Account
Open the Deco App.
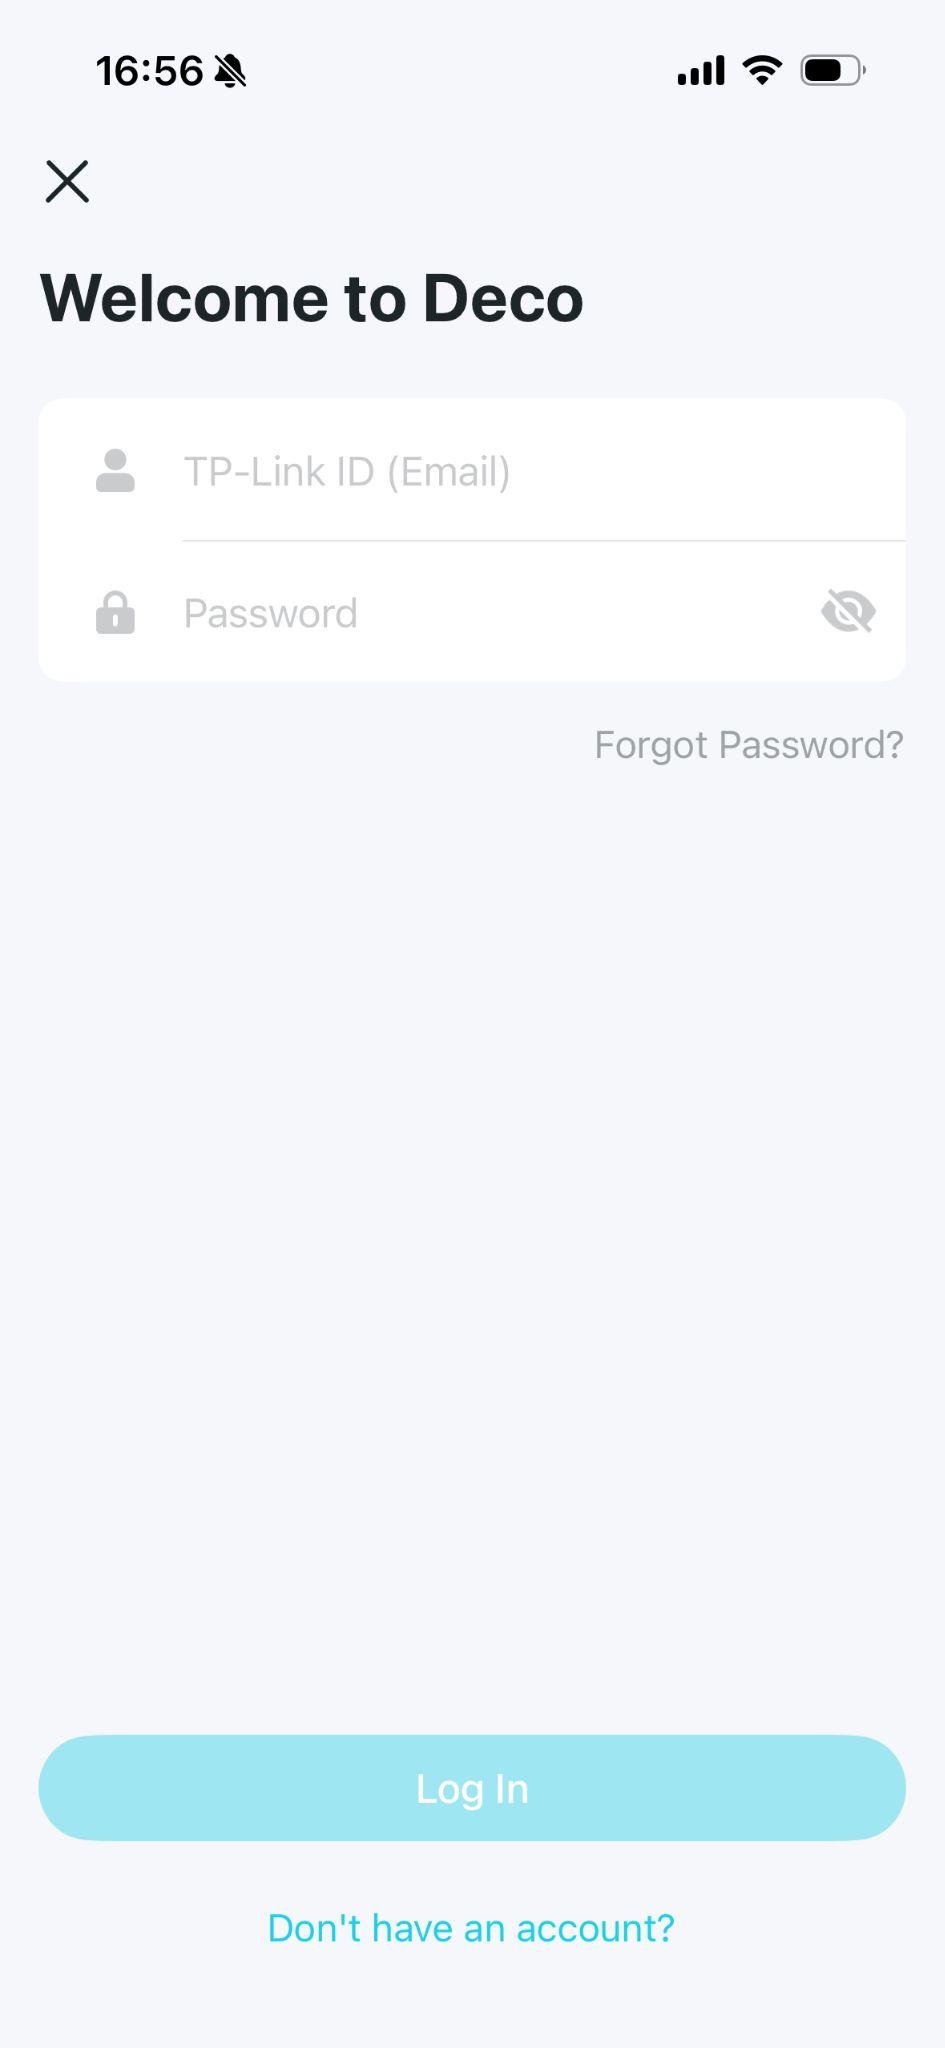
Sign In or Create Your Account
Already have a TP-Link account?
Sign in using your existing TP-Link ID.
New to TP-Link?
Tap “Don’t have an Account” and follow the prompts to create a free account.
If you’ve forgotten your password, select Forgot Password and follow the recovery instructions.
Step 3 — Power On Your Deco M5
Get Your Deco Ready for Setup
1 — Connect Power
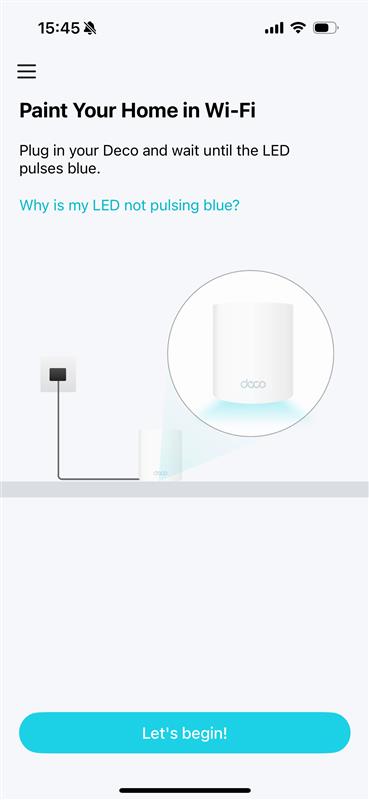
Plug your Deco M5 into power and allow it a couple of minutes to start up.
2 — Look for a Flashing Blue Light
When the Deco M5 is ready for initial setup, its LED should be flashing/pulsing blue.
Flashing Blue = Ready for Setup
Once the light is flashing blue, your Deco should also begin broadcasting its temporary Deco_XXXX setup network.
Not Flashing Blue?
If your Deco M5 is not flashing blue, it may still have a previous configuration stored and may need to be reset before setup.
Reset the Deco M5:
- Keep the Deco connected to power.
- Locate the recessed RESET button on the unit.
- Using a paper clip or pin, press and hold the RESET button for approximately 15 seconds.
- Release the button. The Deco will power-cycle and restart automatically.
- Allow the unit a couple of minutes to restart.
Wait for the light to begin flashing blue again. Once flashing blue, the Deco is ready to be configured and you can continue with the setup process.
You should also see the temporary Deco_XXXX Wi-Fi network become available on your phone, tablet or computer.
See Deco_XXXX? You’re Ready!
The temporary Deco_XXXX network should normally be open by default during initial setup.
You can connect your phone or tablet to this network to continue configuring your Deco.
If your Wakey modem is already online and connected to the Deco, you may also be able to use this temporary connection to download the Deco App first and configure your permanent Wi-Fi name and password afterward.
Step 4 — Start Setup in the Deco App
Open the Deco App and begin the setup process.
In the Deco App
Tap “Let’s Begin”
The app will walk you through selecting and discovering your Deco M5.
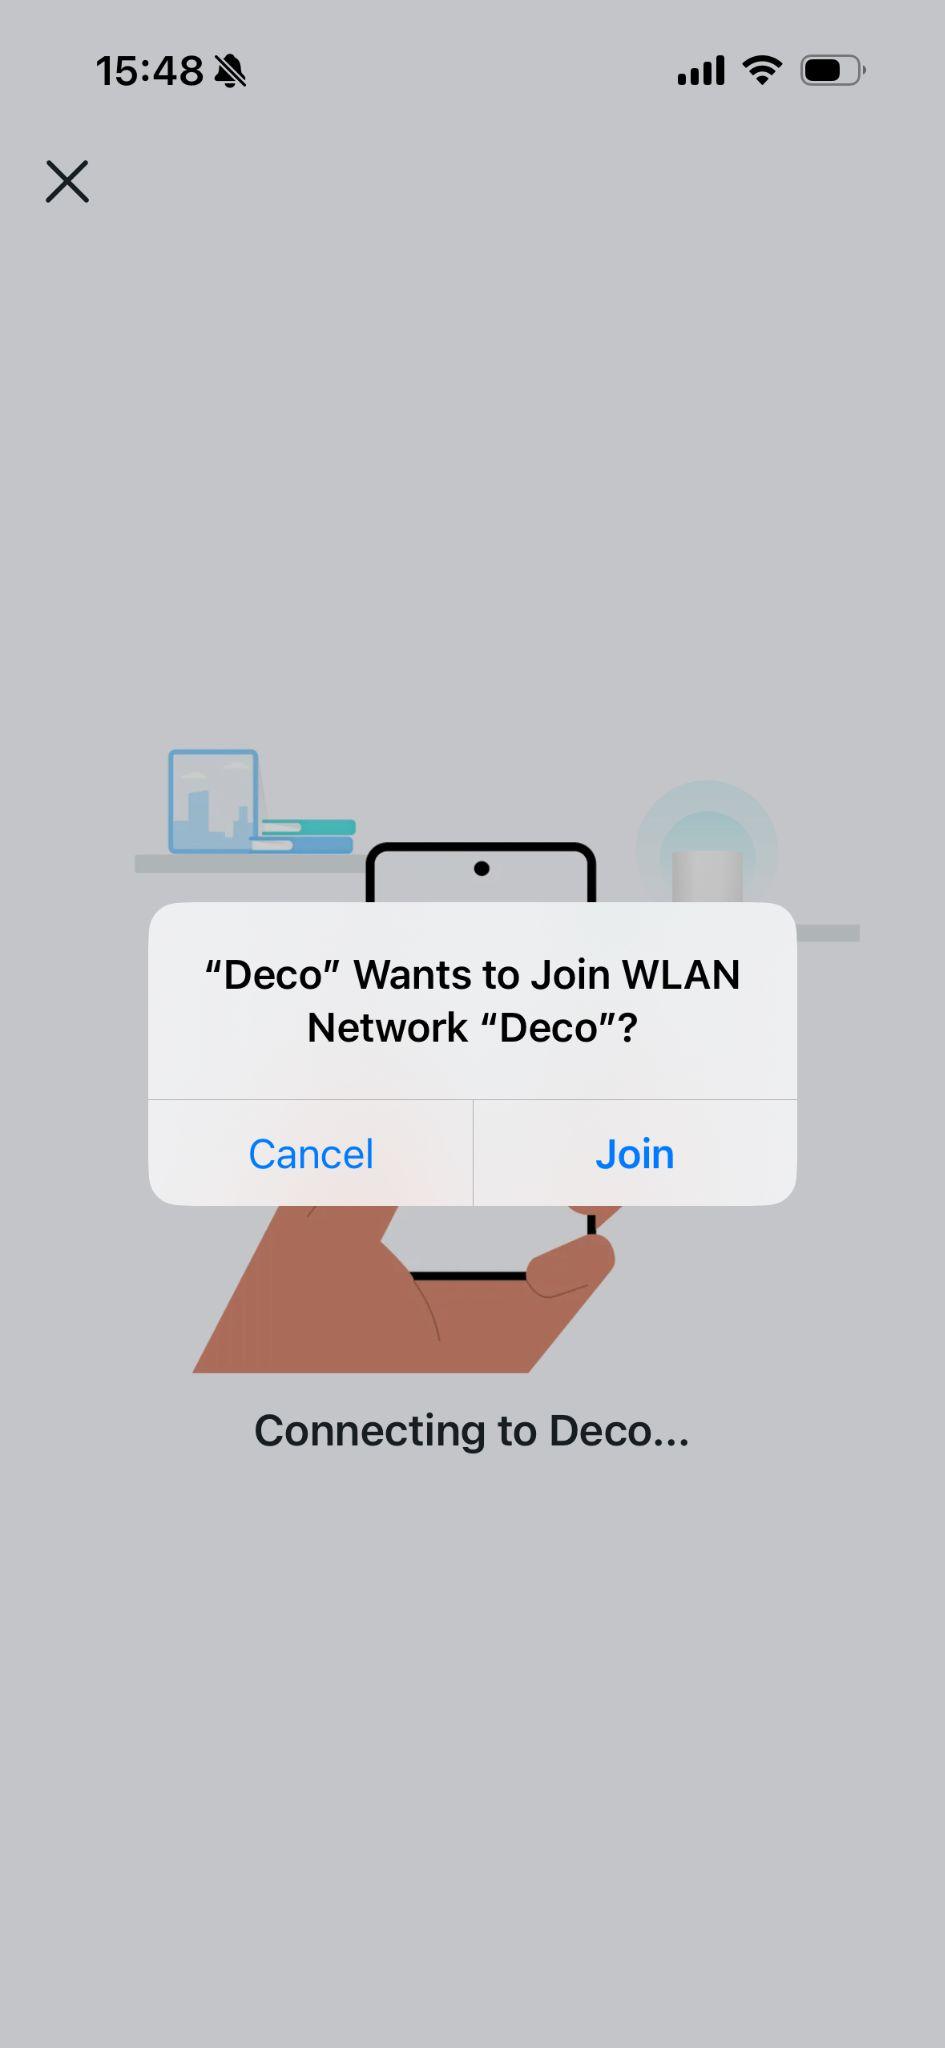
Step 5 — Connect Your Phone to the Deco
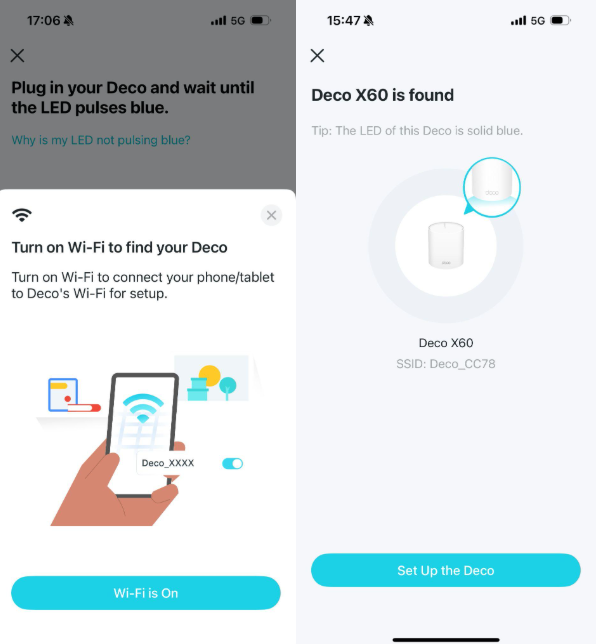
The Deco App will search for your Deco M5.
Option A — Connect by Wi-Fi
Your phone may automatically connect to the Deco’s temporary setup network.
Deco_XXXX
If your phone doesn’t connect automatically:
- Open the Wi-Fi settings on your phone or tablet.
- Look for the Deco network shown on the label underneath the unit.
- Connect to that network.
- Return to the Deco App.
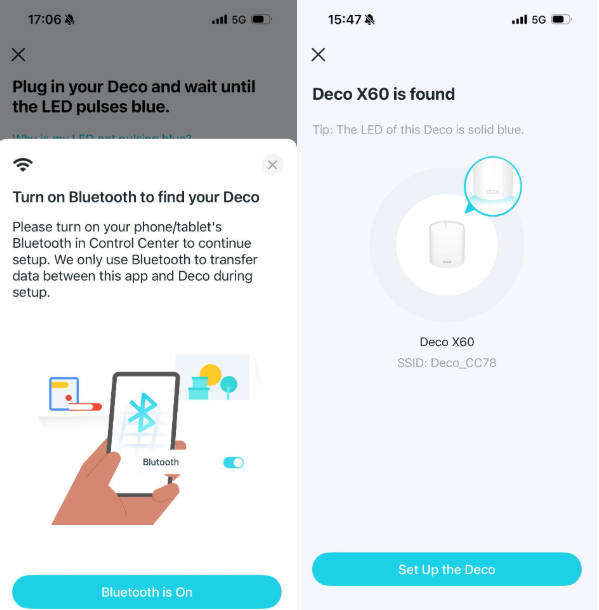
Option B — Bluetooth Discovery
Depending on your phone and app version, the Deco App may also discover the Deco M5 using Bluetooth. Make sure Bluetooth is enabled and allow the Deco App to use it if prompted.
Step 6 — Connect Your Deco to Your Wakey Modem
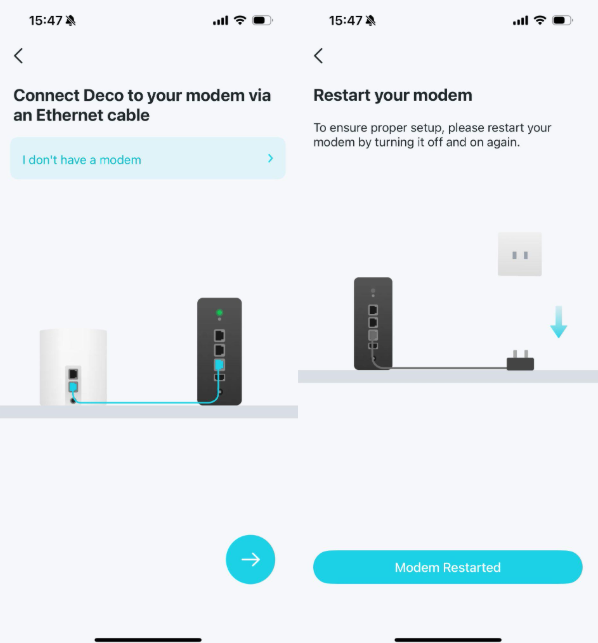
Now it’s time to connect the main Deco M5 to your Internet connection.
Connect the Modem & Deco
1 — Turn Off the Modem
Disconnect your Wakey modem from power.
2 — Connect Ethernet
Connect an Ethernet cable from:
Modem LAN 1 → Either Ethernet Port on the Main Deco M5
3 — Turn the Modem Back On
Reconnect power to your modem.
4 — Wait for the Modem
Allow the modem to fully reconnect to the Wakey network before continuing.
Important — Your Deco Should Be the Only Device Connected to the Modem
For Wakey standalone cable modems, connect your main Deco to LAN Port 1 on the modem.
Do not connect another computer, router or device to the modem’s second Ethernet port. Your main Deco should be the only device connected directly to the modem.
Step 7 — Choose Your Deco’s Location
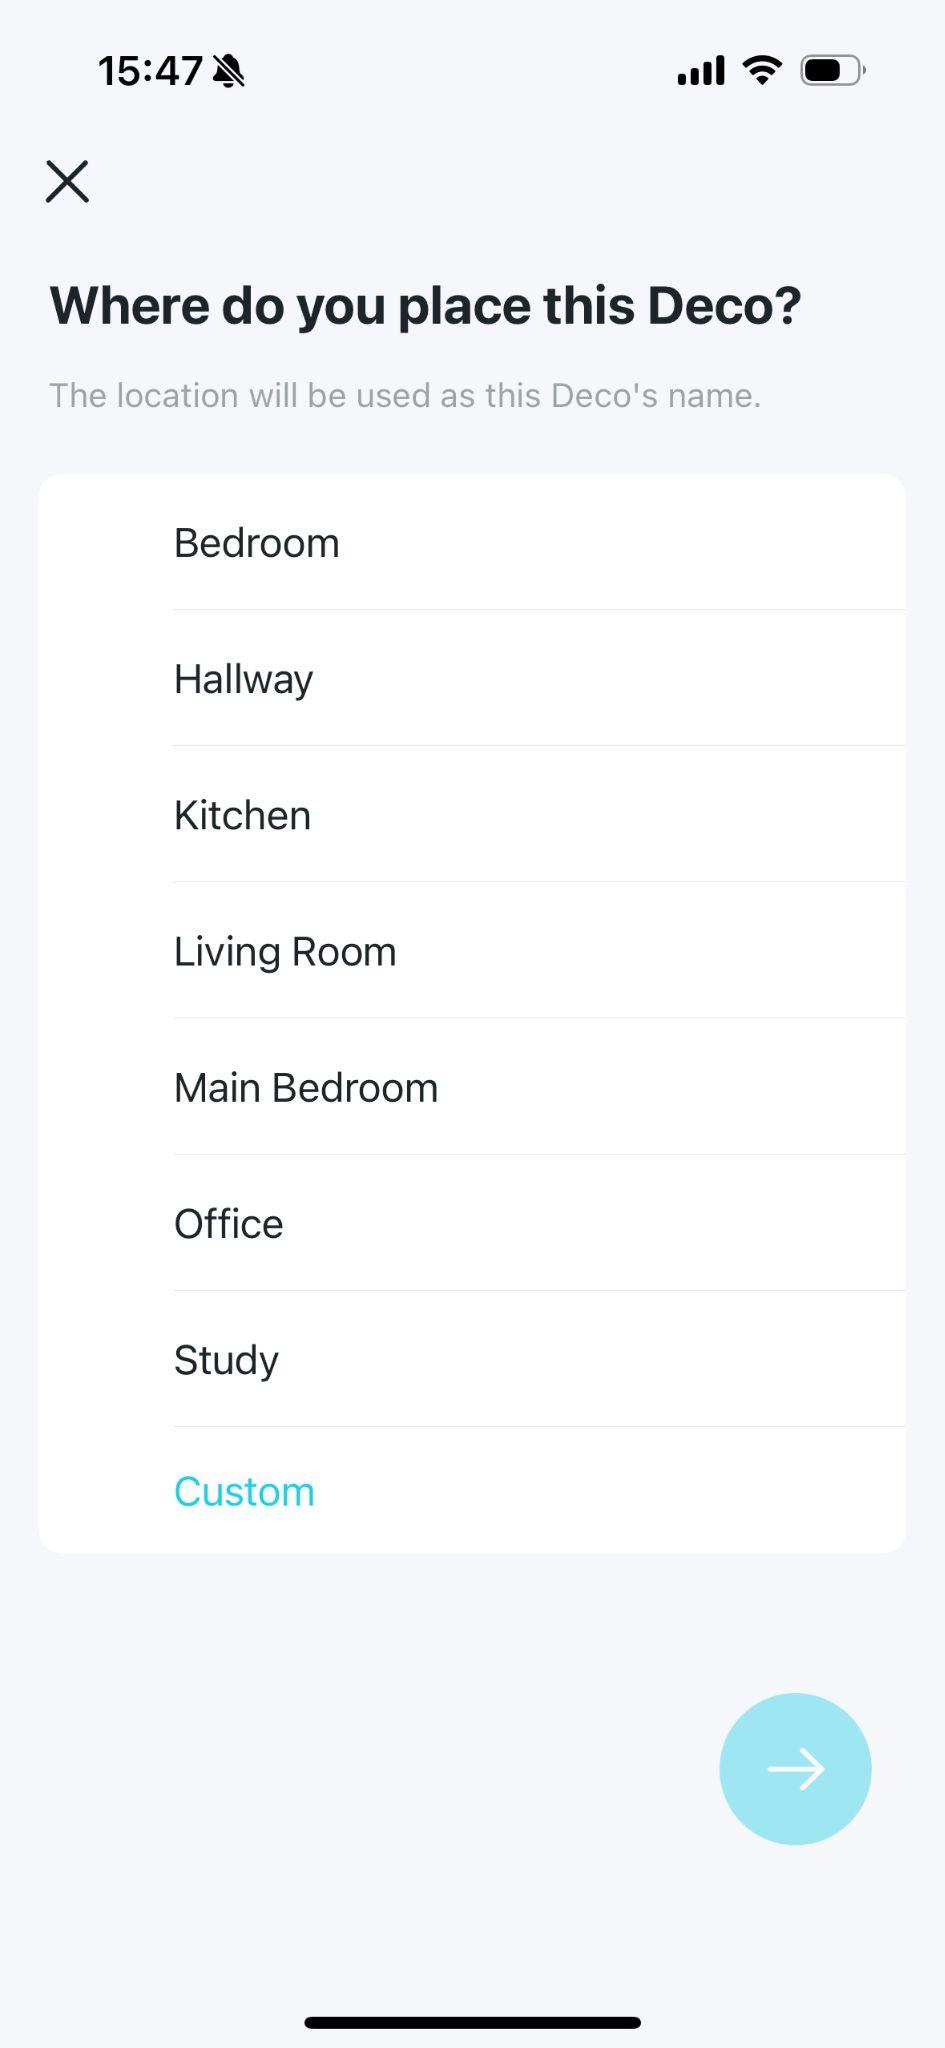
The Deco App will ask where the unit is located.
Name the Room
You can select a location such as:
- Living Room
- Office
- Bedroom
- Basement
- Another custom location
This simply helps identify the Deco inside the app. It does not affect your Internet connection or Wi-Fi performance.
Step 8 — Select Your Internet Connection Type
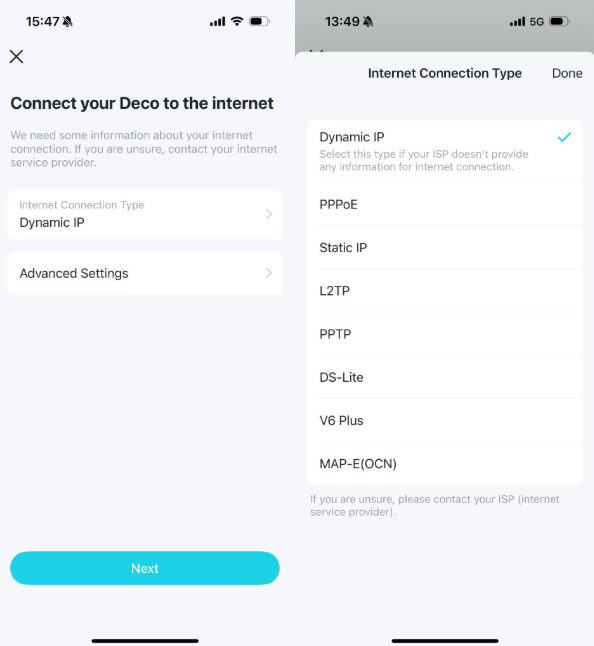
The Deco App may ask which Internet connection type you use.
Wakey Cable Internet
Select: Dynamic IP
Dynamic IP is the correct option for nearly all Wakey Cable Internet connections.
Step 9 — Create Your Wi-Fi Network
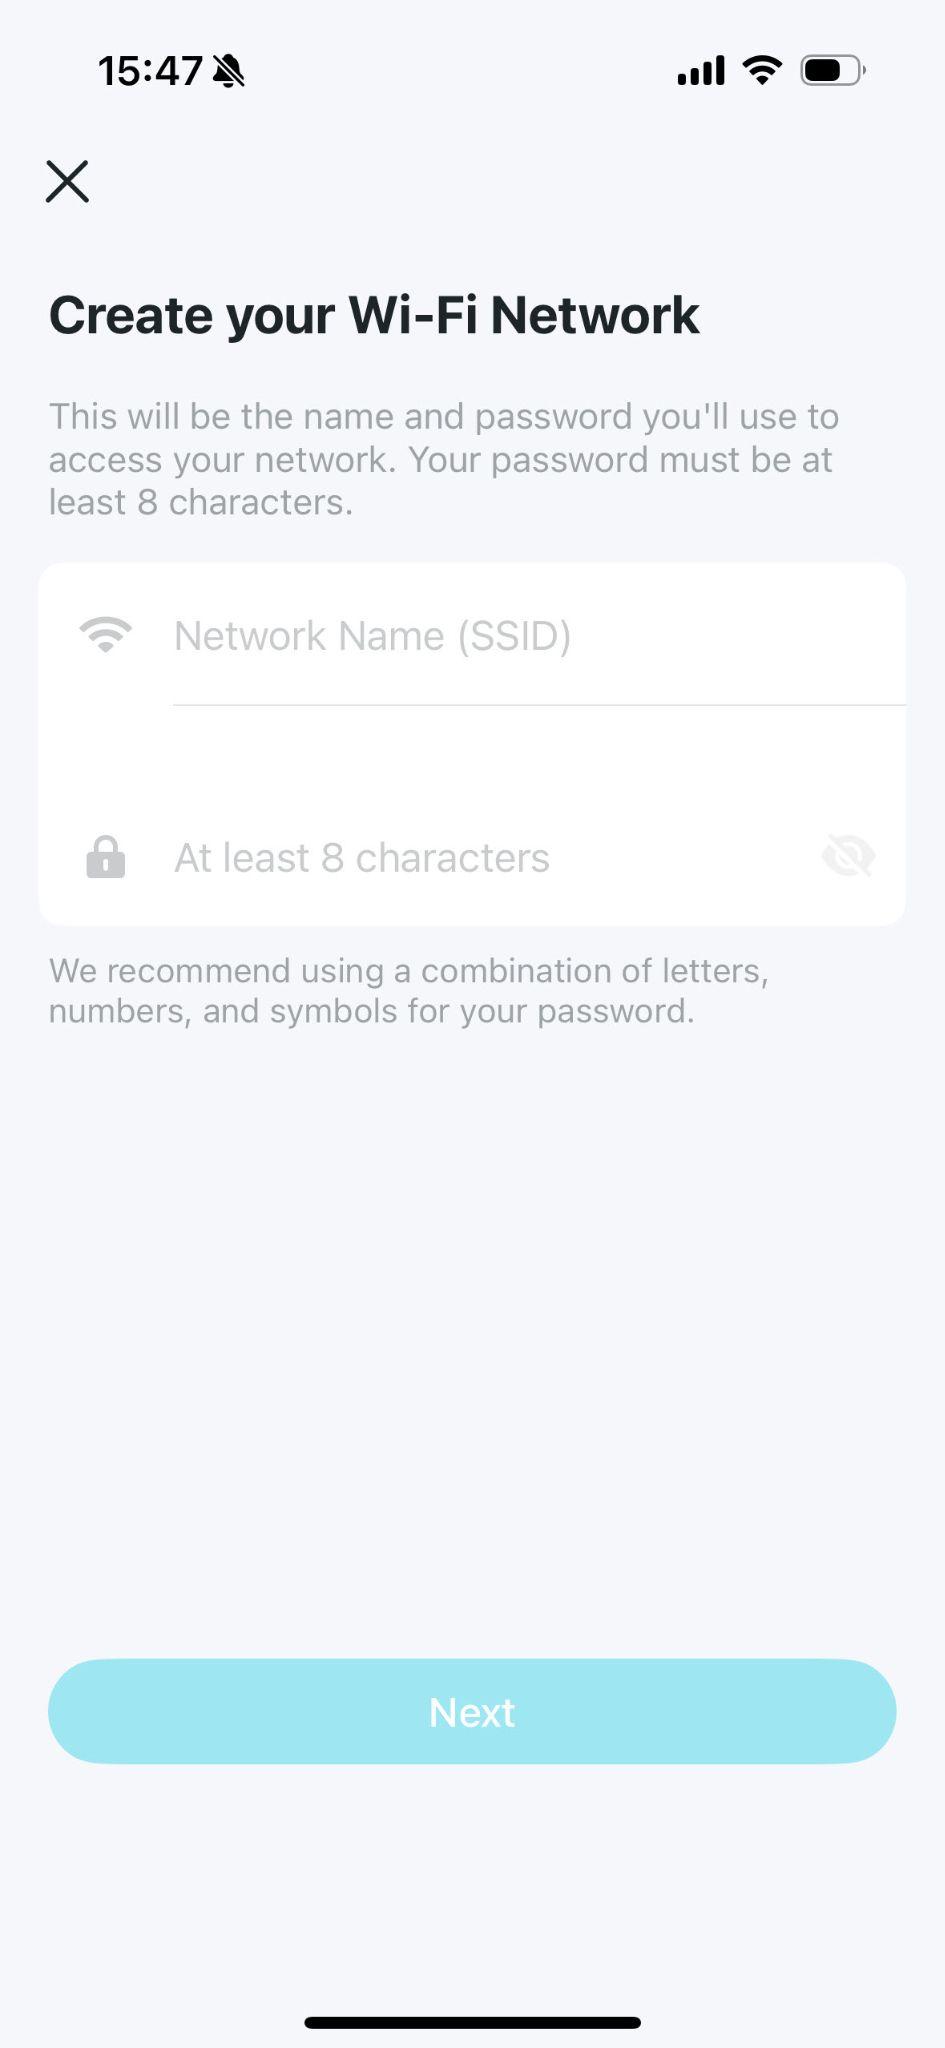
Now for the fun part — choose the Wi-Fi name and password you’ll use throughout your home.
Choose Your Wi-Fi Name
Your Wi-Fi name, also called an SSID, is the network name your devices will see.
Example: Wakey Home WiFi
Create Your Wi-Fi Password
Choose a secure password containing at least 8 characters.
You’ll use this password to connect your phones, computers, televisions and other wireless devices.
Changing From an Existing Router?
If you reuse your previous Wi-Fi network name and password exactly, some of your existing devices may reconnect automatically. Otherwise, you’ll need to reconnect each device using your new Wi-Fi credentials.
Step 10 — Connect to Your New Wi-Fi Network
Your Deco Will Now Configure Itself
After saving your Wi-Fi settings:
- The Deco M5 will apply your configuration.
- Your phone or tablet may temporarily disconnect.
- Open your device’s Wi-Fi settings.
- Select the Wi-Fi network you just created.
- Enter your new Wi-Fi password.
- Return to the Deco App to complete setup.
A brief disconnection during this step is completely normal.
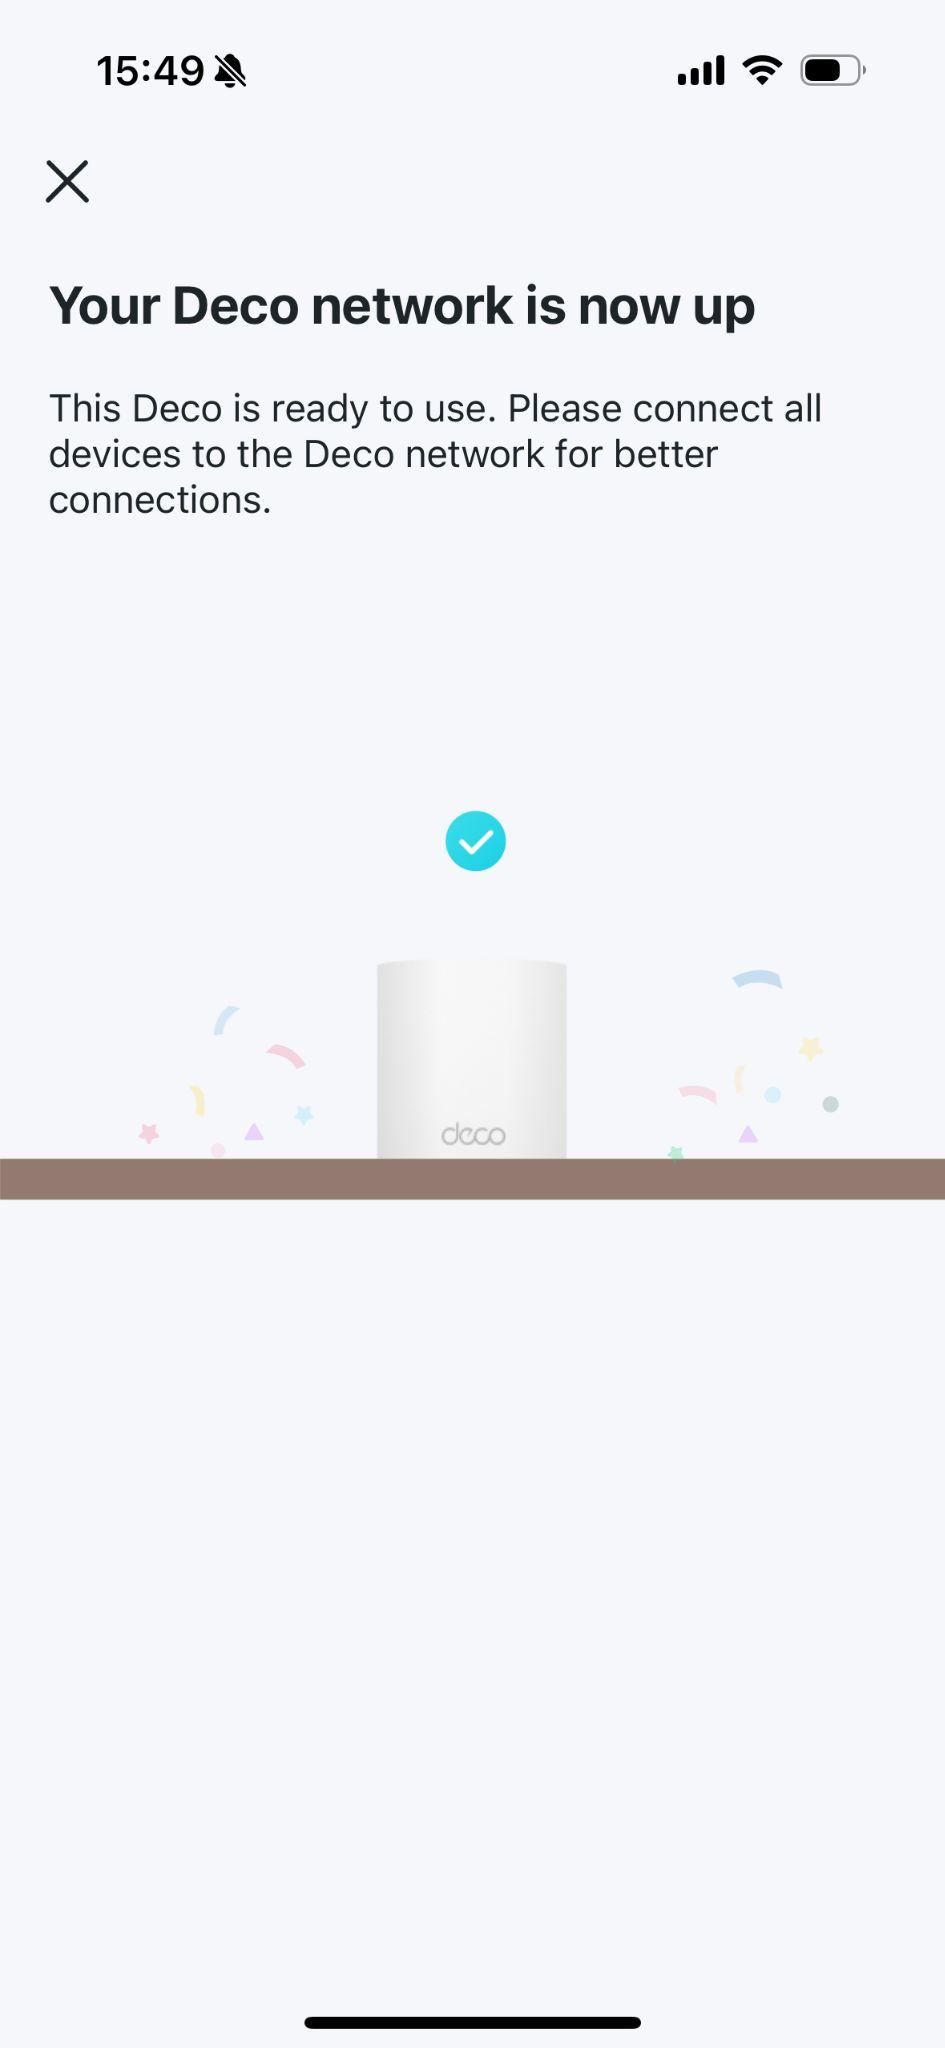
Step 11 — Setup Complete!
Your Deco M5 Is Ready to Go
Your Deco M5 should now be online and broadcasting your new Wi-Fi network.
You can begin connecting your phones, computers, televisions, streaming devices and other Wi-Fi equipment using the network name and password you created.
Modem → Deco → Wi-Fi → You’re Online!
Adding Additional Deco M5 Units
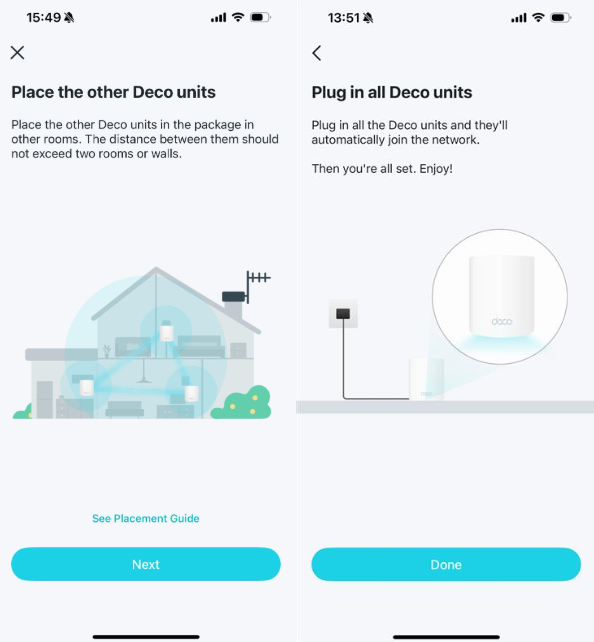
Have more than one Deco? Additional units can help extend your Wi-Fi coverage throughout larger or multi-level homes.
Add Another Deco
1 — Start Nearby
For initial setup, place the additional Deco M5 in the same room as your main Deco.
2 — Connect Power
Plug the additional Deco into power and give it approximately two minutes to start.
3 — Add or Discover the Deco
Follow the prompts in the Deco App to add the additional unit to your existing Deco network.
4 — Move It Into Position
Once the additional Deco has joined your network, move it to the area where you need additional coverage and give it a few minutes to reconnect.
Where Should I Put My Deco Units?
Good Deco Placement
- Place Deco units in open areas.
- Keep them away from microwaves and other sources of wireless interference.
- Position additional Decos between the main Deco and the area needing better coverage.
- Keep them elevated where practical.
- Try to minimize the number of walls and floors between Deco units.
Your additional Deco needs a good connection back to the rest of the mesh network in order to provide a good connection to your devices.
Avoid These Locations
- Inside closets
- Inside or beside metal cabinets
- Behind televisions
- Directly beside large appliances
- At the far edge of an area where the existing Wi-Fi signal is already extremely weak
Don’t place an additional Deco directly inside a Wi-Fi dead zone. Place it between the main Deco and the weak area so it can maintain a strong connection to the mesh.
Troubleshooting Your Deco M5
Deco Isn’t Ready for Setup?
If the Deco has previously been configured or isn’t entering setup mode, you may need to reset it before starting again.
Locate the RESET button on the Deco M5 and follow the reset process, then allow approximately two minutes for the unit to restart.
When the LED is pulsing blue, the Deco is ready to be configured in the Deco App.
No Internet After Setup?
Check these items first:
- Make sure the Wakey modem is fully online.
- Make sure the main Deco is connected to LAN Port 1 on the modem.
- Verify the Ethernet cable is securely connected at both ends.
- Confirm Dynamic IP was selected for your Wakey Cable Internet connection.
- Restart the modem.
- Wait for the modem to fully reconnect.
- Restart the main Deco M5.
Try a Clean Restart
If everything appears connected correctly but you still don’t have Internet, restart the equipment in this order:
1. Turn off the modem and Deco.
2. Turn the modem on first.
3. Wait until the modem is fully online.
4. Turn the Deco M5 back on.
5. Give the Deco several minutes to reconnect.
This allows the modem to establish the Internet connection before the Deco requests connectivity from it.
Restarting and Factory Resetting Are Different
For most problems, start by restarting the modem and Deco rather than factory resetting them.
A factory reset removes the Deco’s existing configuration and may require you to set up the unit again through the Deco App.
Need Additional Help?
The Wakey Crew Is Here to Help
If your Deco M5 still isn’t connecting after following the steps above, reach out to the Wakey Crew.
Before contacting us, it’s helpful to check:
- What colour the Deco LED is showing
- Whether your modem is fully online
- Whether the Deco is connected to LAN Port 1 on the modem
- Whether the issue affects all devices or only one device
That information helps us get to the next troubleshooting step faster.